


We absolutely LOVE having fundraisers in the Loveless Barn (or bringing our culinary team to other Nashville venues) and we want to make the planning process as easy as pie, especially for any first-timers out there. Putting together a successful fundraiser takes a lot of hard work from a lot of people, so here are a few insider tips we hope you find helpful!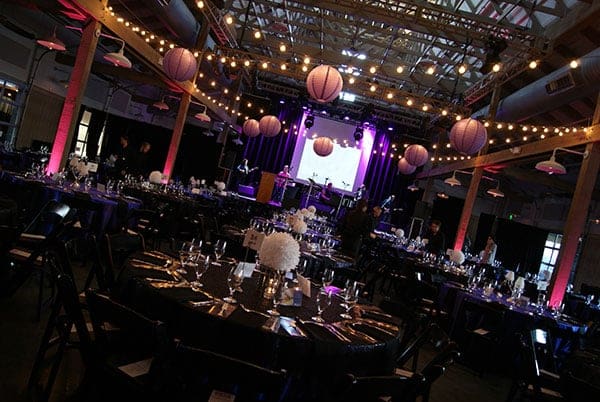
Before The Event:
1. Choose Your Point Person!
Often times with fundraisers and non-profit organizations, more than one group or committee might need to be involved in planning. It is always best to have at least one designated point person involved in every meeting so they can be well-informed in all aspects. This will help to alleviate miscommunication or misunderstanding as well as relay committee opinions and choices. It will also streamline the pertinent information.
Sometimes groups will have someone on the board or a CEO who wants to see the venue at a separate time. That’s always a great idea so they know exactly what to anticipate! Your main point person should accompany them in order to explain the general plan and details as well as answer questions that may arise. Also, be sure to schedule this site visit with the venue so they can expect you.
2. Find a Venue & Caterer!
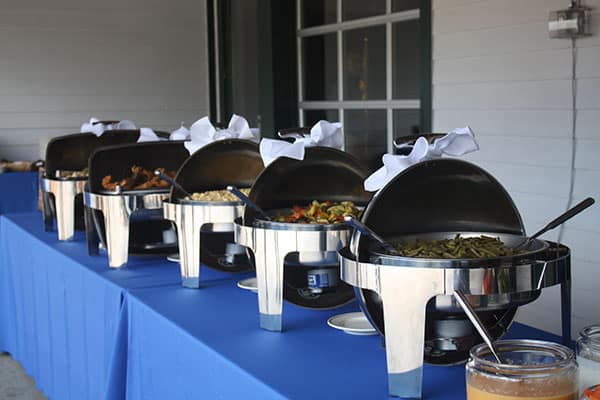
Once your planning committee has a general idea of what your fundraiser will look like, you need to find the perfect venue that will complement your needs and on. Will you need space for welcome and registration? Will you have a silent auction? Do you want a buffet or appetizers or action stations for food? Will you be serving alcohol? Most important for the venue search process: How many people do you expect to attend and what is your budget?
Schedule committee meetings in advance of any meetings with venues and caterers to make sure you have a list of questions prepared. During site visits, be sure to ask what’s included with venue and menu pricing. Note that your venue, caterer, and other vendors do not need to be involved in every planning meeting you have – feel free to brainstorm on your own and then have your point person communicate those thoughts with the vendors.
Set your RSVP deadline well in advance of the event, knowing you may receive late RSVPs. Venues and caterers will always need a final guest count at least one week before the event in order to finalize their orders for tables, chairs, linen, food, staff, etc. This way you can still allow for some last-minute responses and have a final count when it’s due.
3. Finalize Details Ahead of Time!
Email your planning committees all of the final details and decisions about one month prior to the event so they can look over everything and ask questions or request changes in advance of required deadlines.
If your fundraiser includes a silent auction, be sure to start collecting donations well in advance so you can figure out how much space is needed to display items.
Helpful Hint: Organize all auction donations in separate boxes (perhaps 1 box per table) with all the necessary ‘extras’ (frames, papers, pens, labels, etc.) so it’s all ready to go upon arrival.
Check with your venue about any social media opportunities! They may be interested in sharing your event on their platforms and collecting content after to use in promotions. This is a great way to cross-market and engage all audiences!
On Event Day:
1. Know Your Timeline!
Make sure your main point person is the first one to arrive (at your contracted time) on event day! He or she can welcome volunteers, vendors, and committee members as you all arrive to help set up. That way you also have this person to make sure everyone is staying on task.
2. Delegate Duties!
Assign and explain specific duties ahead of time to everyone who will be there, so they know what they need to do. This way, no one is wasting time or doing anything wrong they might not realize.
Examples: registration forms, auction tables, welcome or directional signage, drink tickets, programs or goodie bags at seats, awards on stage, centerpieces, etc.
Designate at least one person to stay until everything has been loaded out at the end of the event. This is good for any lost & found items as well as final questions or requests from vendors, guests, or the host organization. Venues will always have someone on-site and this gives them a point person too.
3. Be Extra Prepared!
Bring extra print-outs, decorations, goodies – anything you may need in case of emergency.
Helpful Hint: Bring a “tool box” with you to the venue with always-handy items such as pens, scissors, tape, command strips, gum, snacks, band aids, etc.

After The Event:
1. Collect Feedback!
Ask for honest feedback from your committees, volunteers, and vendors. Take notes on what you want to change, remove, or keep the same next year if it is an annual event. Also share this feedback with necessary parties, such as complaints or compliments for the venue, caterer, or organization as a whole.
2. Share Your Success!
Be sure to post on your social media accounts with photos! If you hired a professional photographer, ask permission to share the images with your venue, caterer, and vendors. That’s another great cross-marketing opportunity to highlight your event while the vendors promote their services.
Send thank-you notes to everyone who helped plan your event along the way, from vendors and volunteers to sponsors and guests.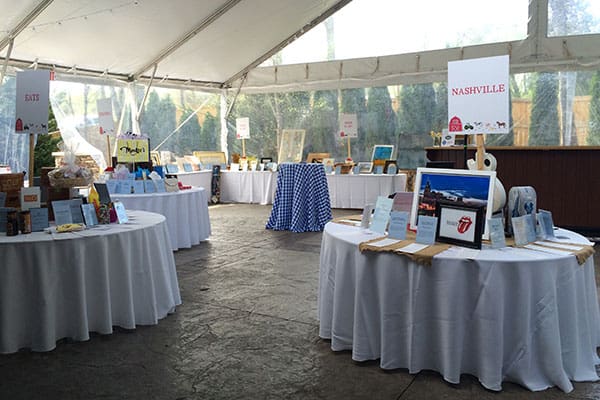
Loveless Events: A Sophisticated Southern Experience.